
Megan Pflug, style guru behind our Weekend Decorator column, is an editor and interior designer based in New York. She’s back with her latest crazy-cool DIY solution—this one to help you hack your summer garden goals.
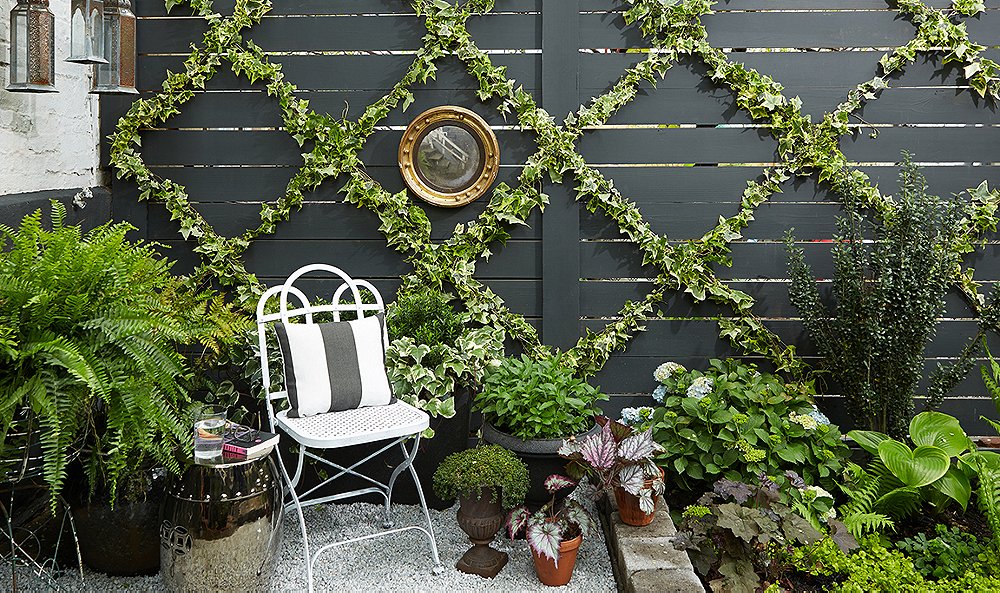
I live in a small house, but being on the first floor I’m blessed with a tiny garden that makes up for what I lose out on square footage inside. It truly feels like my personal oasis, especially now as summer’s taking off. I revamped my backyard last year, but as we all know garden work is one of those perennial projects. I’ve been really inspired by that lush overgrown garden look recently, and while I was poking around for greenery ideas I rediscovered the espalier.
Espalier is an old-school method of growing plants against a wall in a two-dimensional pattern. The technique was developed in 17th-century France as a way to increase the yield of fruit trees in small garden spaces. Despite its historic horticultural roots, an espalier is actually relatively easy to recreate in your own garden. It’s the perfect way to add vertical visual interest (especially if you have a small garden), since it doesn’t block light and takes up virtually zero land space.
Keep reading for my foolproof tips and fast-growing plant recommendations for creating a simple and superchic espalier garden trellis at home.
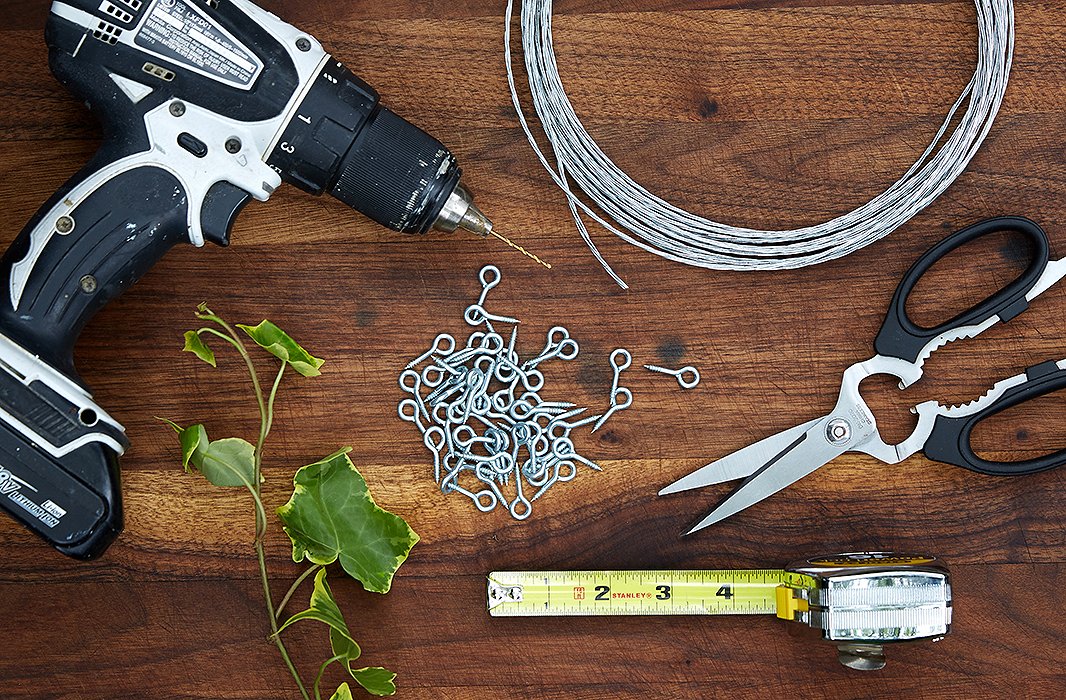
Here’s What You’ll Need:
Galvanized wire
Eye hooks
Wire snips
Measuring tape
Drill and small drill bit
Vines (number of pots dependent on trellis pattern)
Step 1: Picking the Right Plants
The key to success for your espalier is picking the right plant. Choose a spot for your trellis and, most important, take into consideration the climate and the light conditions before buying your plants. Garden centers are great at helping to identify regionally appropriate varieties.
If you want instant results (like me), vines are a quick win. Ivy is probably the hardiest option—it’s fast-growing, tolerant of shade and sun, and easy to care for. But just remember, ivy isn’t an ideal option for brick walls, because its aerial roots (roots above ground) can wind their way into cracks.
If you’re looking for a flowering vine, jasmine, bougainvillea, climbing hydrangea, and wisteria are all fast-growing beauties.
Tip: Choosing a mature plant that already has long tendrils will give you a head start.
Step 2: Decide on Your Pattern
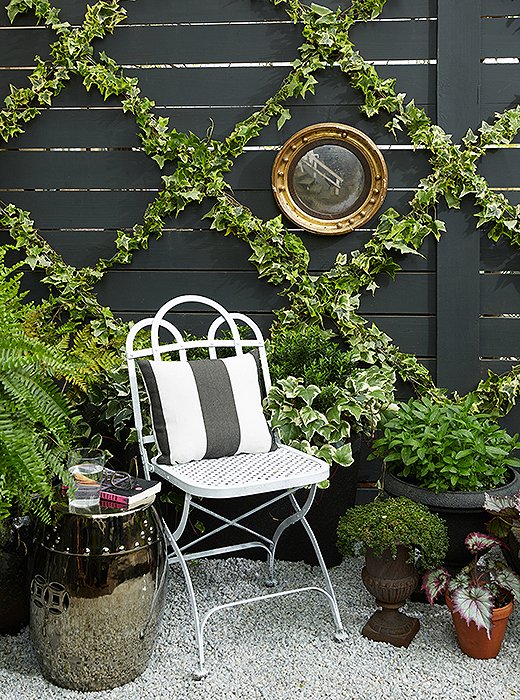
Classic espalier patterns generally fall into two styles: the Belgian fence pattern (a crisscross trellis) and the candelabra pattern (a branching tree shape). I went with the Belgian fence pattern, which lends itself well to vines and is very simple to lay out. The candelabra pattern (aka the horizontal cordon) is generally better used with trees or wood-stemmed varieties that grow from a single plant in the ground. If you go with the candelabra, just keep in mind that this shape requires more pruning and takes longer to grow and fill out.
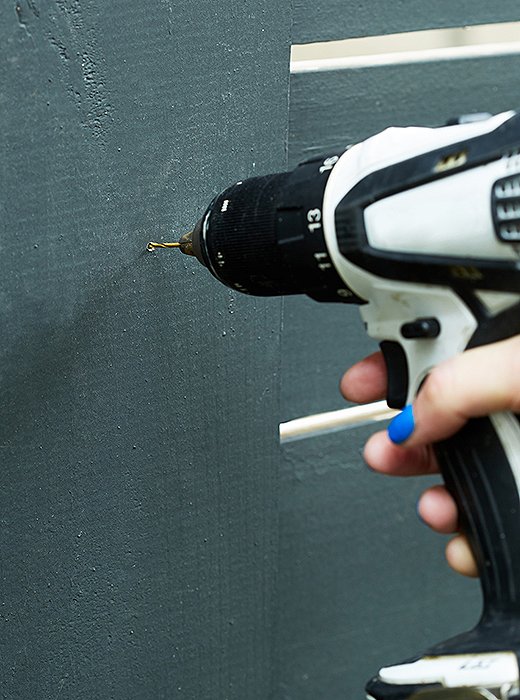
Step 3: Space Out Your Pattern and Supports
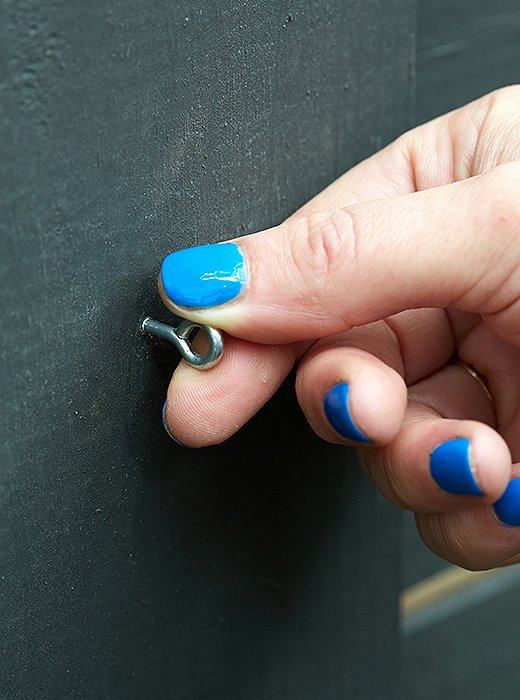
Once you’ve settled on a pattern, use a measuring tape and a pencil to mark the location for your eye hooks. I used one eye hook at every point where my grid of wires intersected, about 12 in total. The number will vary based on your specific layout. To make screwing in the eye hooks a little easier, drill a shallow hole first.
For larger-stem plants like wisteria and hydrangea you will need larger eye hooks that allow the wire to stand 1-2 inches away from the wall or fence. The extra space prevents the vines from becoming bound between the wire and the fence or wall.
Tip: Make sure your drill bit is smaller than the screw end of your eye hooks. This will ensure they are secure.
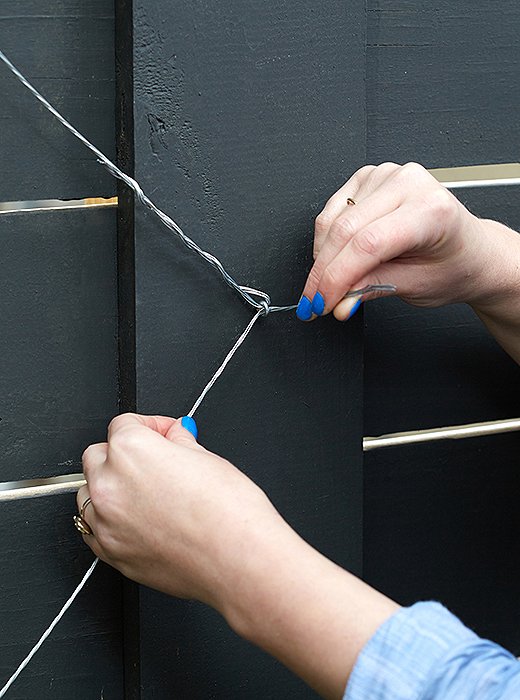
Step 4: Thread and Secure the Wire
Next, cut lengths of wire a few inches longer than you need, and thread them through the eye hooks. Use the remaining few inches to secure the wire in place by wrapping it back around itself.
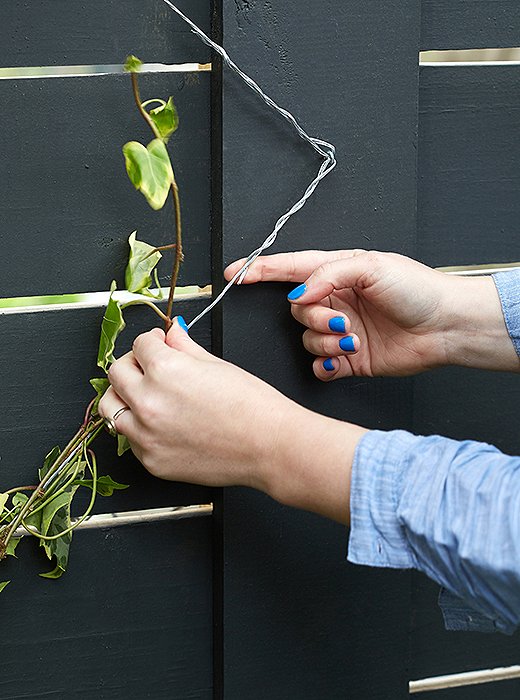
Step 5: Entwine Your Plant
With your wires in place it’s time to plant! Place your potted plants close to the wall and in a position where it can easily reach the lowest point of your espalier design. For my Belgian trellis pattern, I used six potted vines, placing one beneath each of the low points. If you go with the candelabra’s tree-shape layout you’ll need just a single plant that will grow up and branch out. (That’s one reason it takes the candelabra formation so much longer to mature.) But regardless of your plant choice, you will need to encourage new growth to follow your pattern by gently wrapping it around the wires.
Tip: If your plant needs a little extra help staying in place you can use garden ties.
Step 6: Finish with Some Flourish!
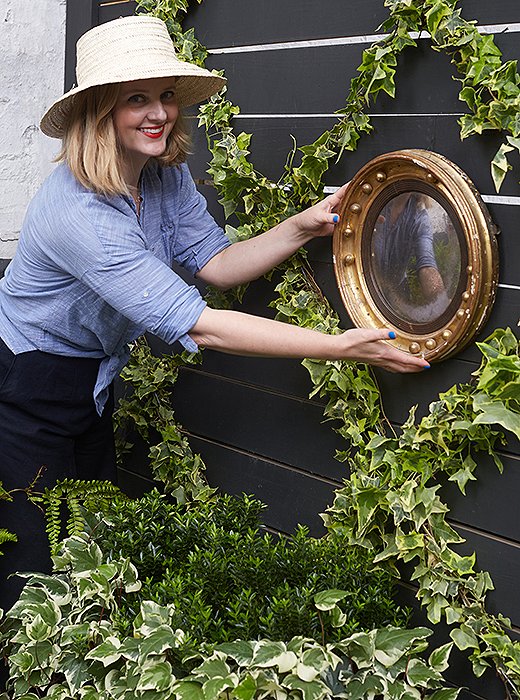
And there you have it! An espalier design that’s stylish and easy to maintain (and to pull together at home in no time!). I carved out a little corner for myself next to my trellis with one of my white-painted iron chairs, a garden stool, and a vintage porthole mirror for a tad of cozy and shine. With a little care and (hopefully) lots of sunny summer days, I know this wall will only get more beautiful.
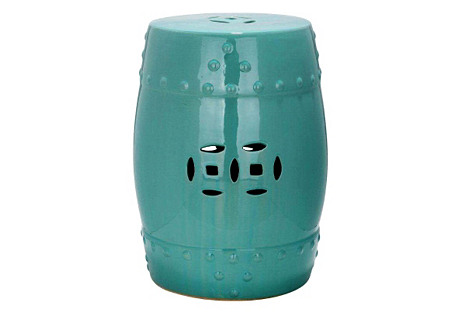
Naimh Ceramic Garden Stool, Teal
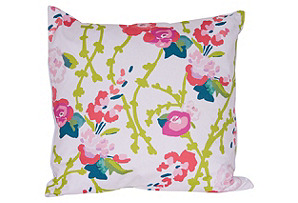
$129 SHOP NOW FavoriteChintz 22x22 Pillow, Pink/Green $175 Favorite
See below for more of my Weekend Decorator projects on One Kings Lane!
Simple Storage Upgrades for Tiny Kitchens
Original article and pictures take https://www.onekingslane.com/live-love-home/backyard-makeover-garden-trellis-ideas/?utm_source=pinterest&utm_medium=social&utm_content=WD_DIY_trellis_main_rightvertical&utm_campaign=WD_blog&crlt.pid=camp.smfQJTK3c2yQ site
Комментариев нет:
Отправить комментарий